
Available from
v1.1.4-betaOnly in Pro version?
No, also in the free versionIntroduction 3D printing cost calculator
Our 3D printing cost calculator offers you the opportunity to calculate 3D printing costs quickly and easily. Starting with the essential information, such as printing time & volume, you also have the option of calculating additional work steps, machine hourly rates, energy costs, profit & taxes. This document introduces and explains all areas of the calculator.
The dashboard
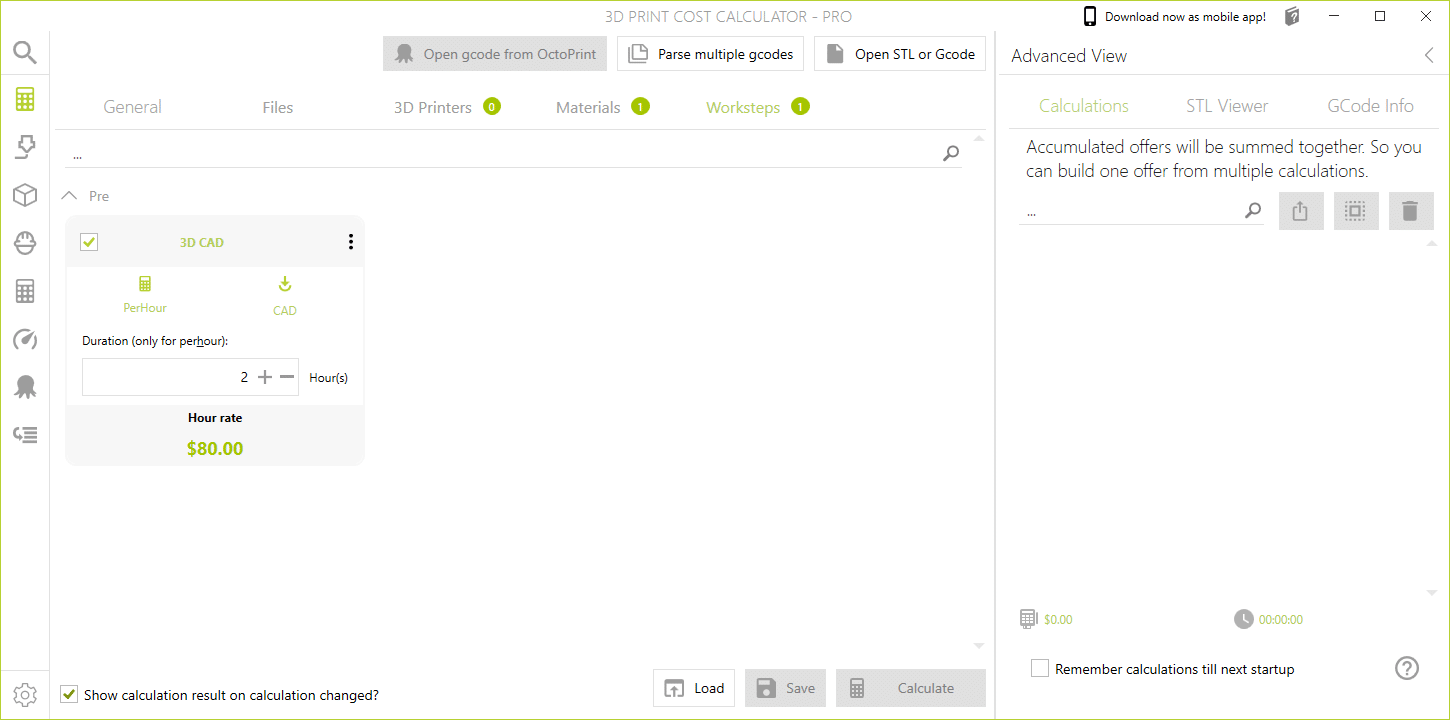
The dashboard is the heart of the calculator. This is where you do your calculations.
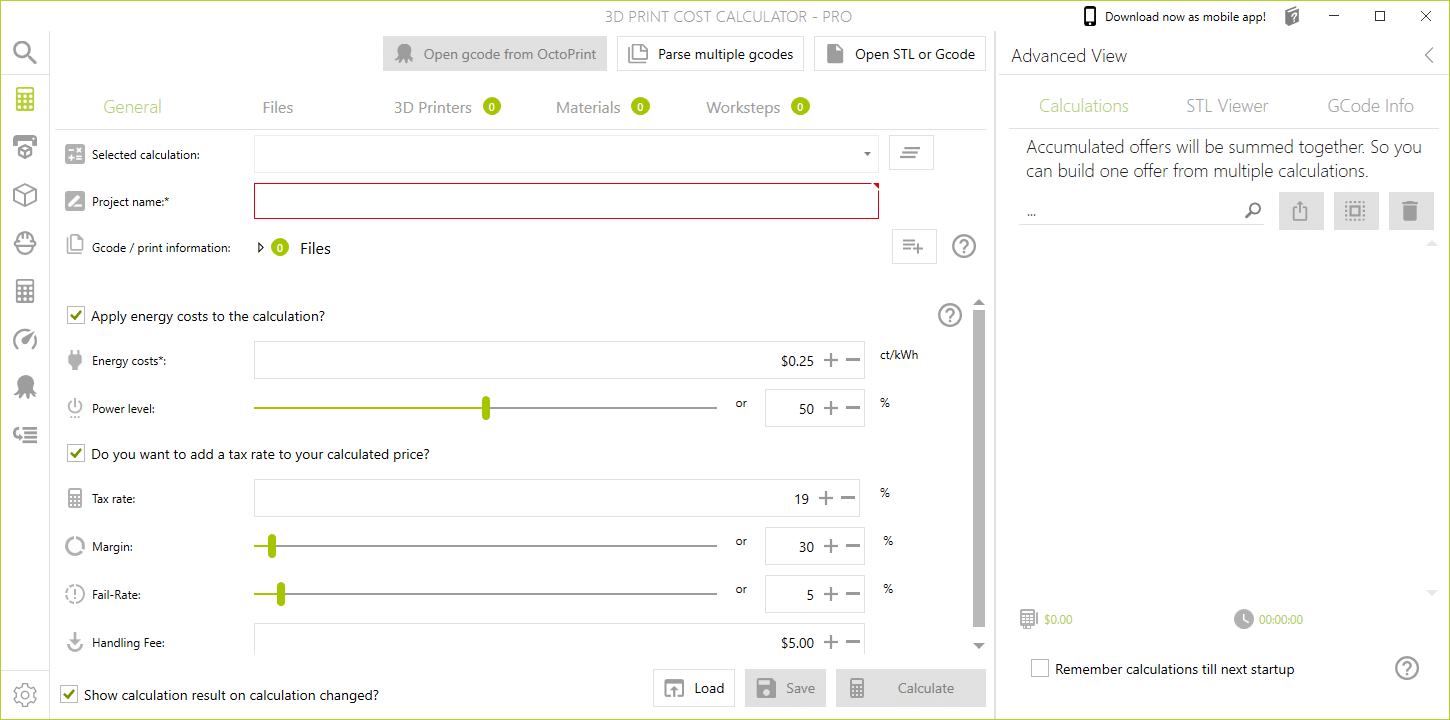
Das Dashboard ist in einzelne Teilsegmente bzw. Reiter unterteilt. Unter “Allgemein” gibst du die grundlegenden Informationen zu deinem Druckauftrag an. Darunter zählt z.B. der Projektname, die Gcode-Datei(en), sowie Energiekosten, Steuern, Gewinne, Handlungspauschale usw.
Extended view
Rechts findest du im Dashboard noch die “Erweiterte Ansicht”. Diese zeigt dir vor allem Informationen zu deinen Gcode- / STL-Dateien an. Des Weiteren findest du hier auch deine letzten Kalkulationen.
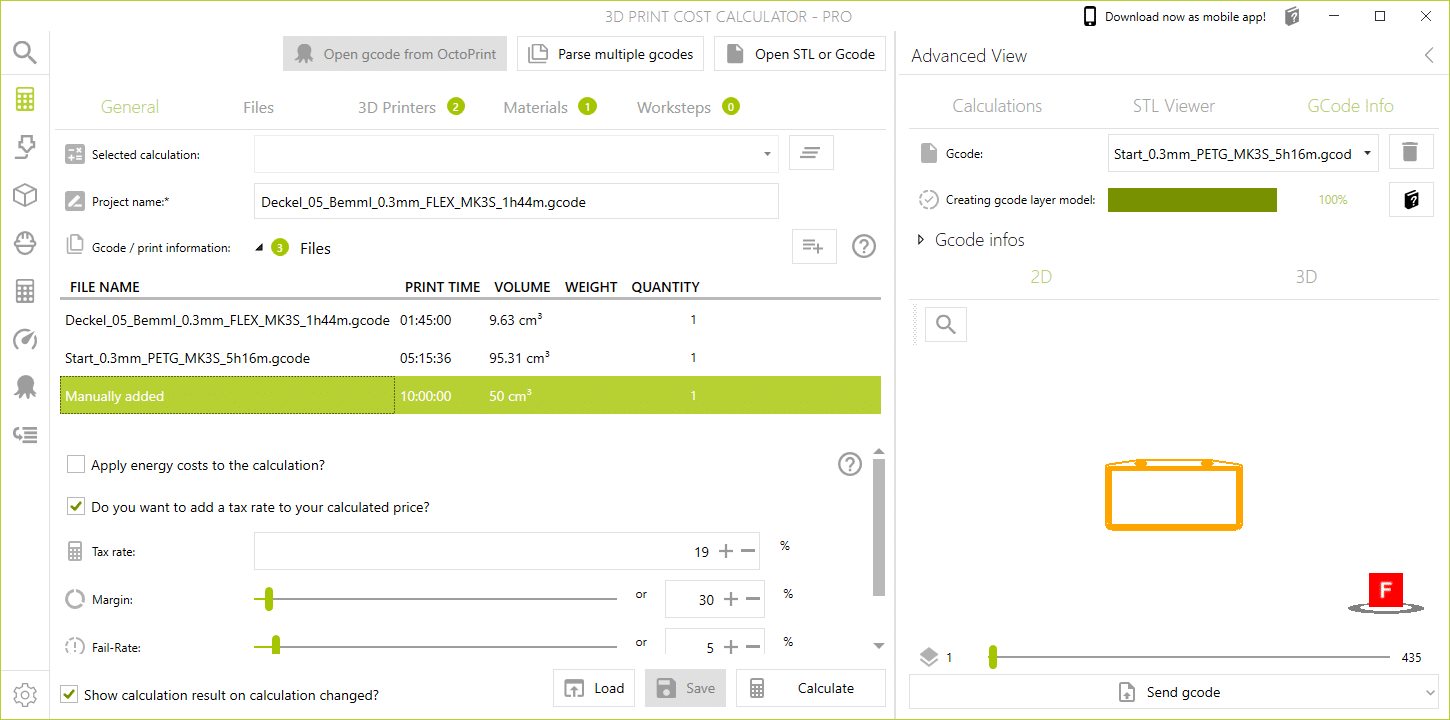
General
Hier führst du deine Berechnungen aus. Du hast die Möglichkeit mehrere Gcode-Dateien einzulesen. Dazu kannst du entweder den Button für “Mehrere Gcode-Dateien analysieren” verwenden, oder einfach per Drag & Drop Dateien in die Ansicht ziehen.
Selected calculation
Wenn du eine oder mehrere Kalkulationen durchgeführt hast, dann erscheinen diese in der erweiterten Ansicht unter “Kalkulationen”. Diese Kalkulationen kannst du zum Bearbeiten in dem Dropdown-Menü auswählen.
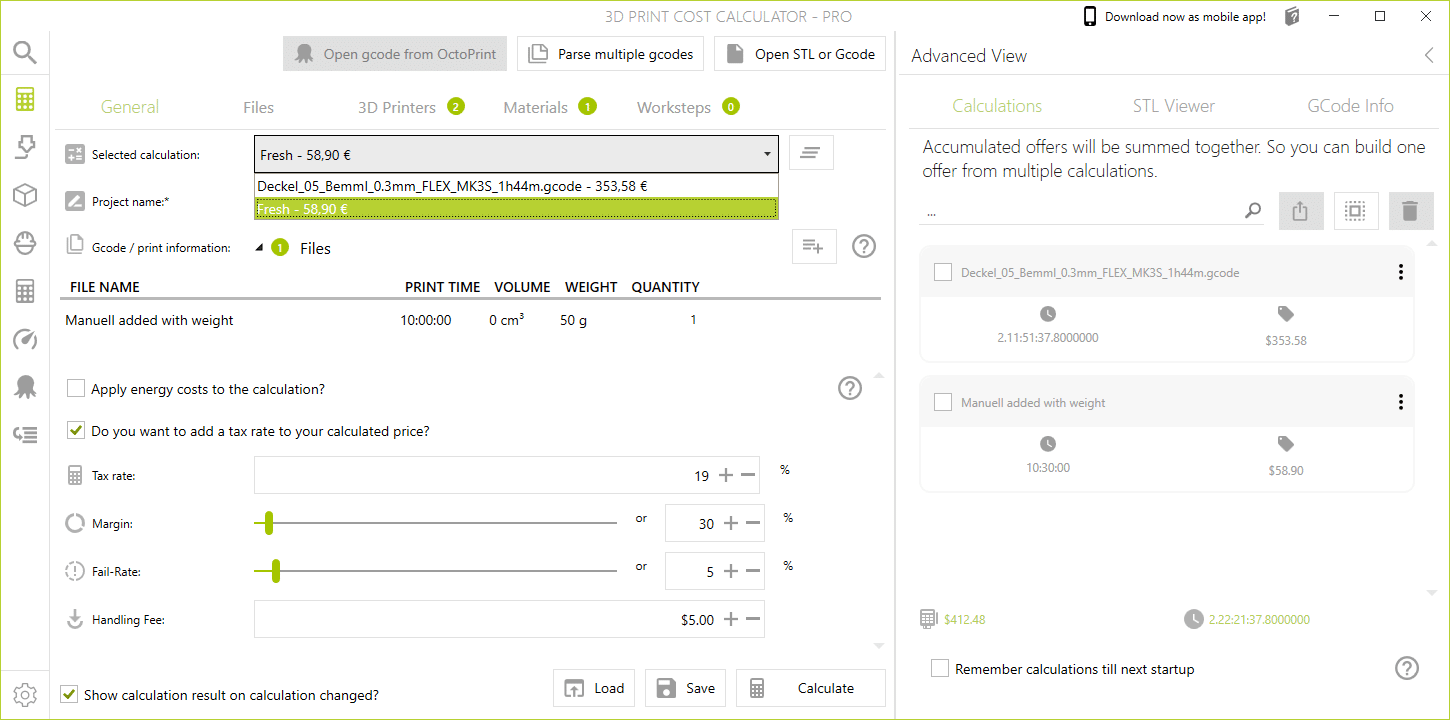
Beim Ändern der Kalkulation, sofern die Option “Zeige Kalkulationsergebnis, wenn Kalkulation geändert wird?” gesetzt ist, wird das Ergebnis direkt angezeigt. Andernfalls wird nur die Kalkulation in den Kalkulator geladen. Änderungen führen dazu, dass keine neue Kalkulation angelegt wird, sondern die gewählte aktualisiert wird.

Alternativ kannst du auch direkt aus der erweiterten Ansicht Kalkulationen in den Kalkulator laden. Öffne dazu das Menü der jeweiligen Kalkulation und wähle “In Kalkulator laden”. Dies hat den gleichen Effekt, wie wenn die Kalkulation über das Dropdown-Menü geändert wird.
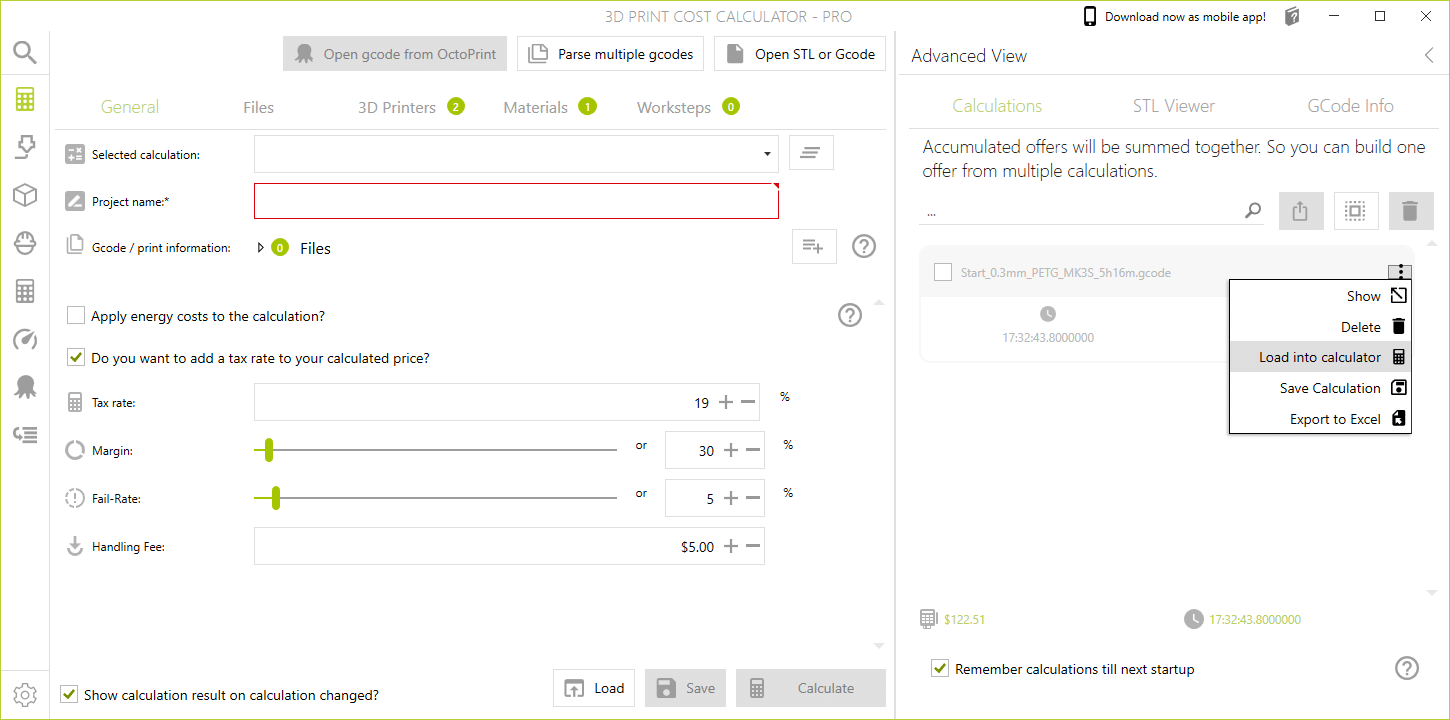
Tipp: Wenn du möchtest, dass deine letzten Kalkulationen beim Beenden des Tools gespeichert werden, setze die Option “Merke Kalkulationen bis zum nächsten Start”.
Gcodes
Diese Dateien erscheinen dann im Bereich “Dateien” und unter “Gcode-/Druckinformationen”, sofern der Bereich aufgeklappt ist.
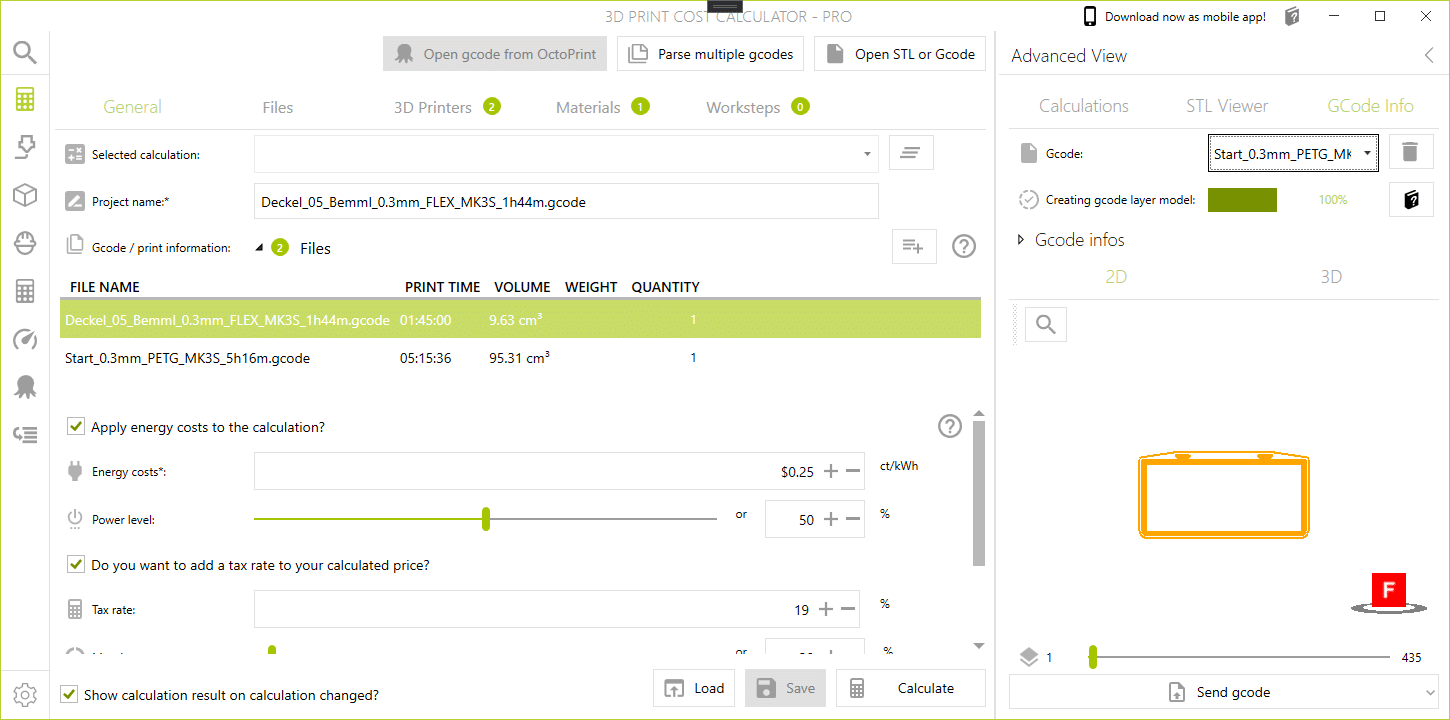
In the extended view you can also switch through the Gcode files. This will then show you the 2D and 3D models.
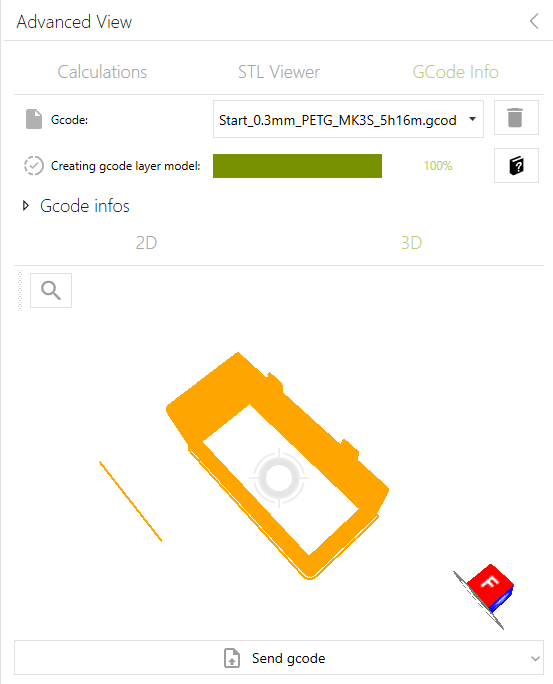
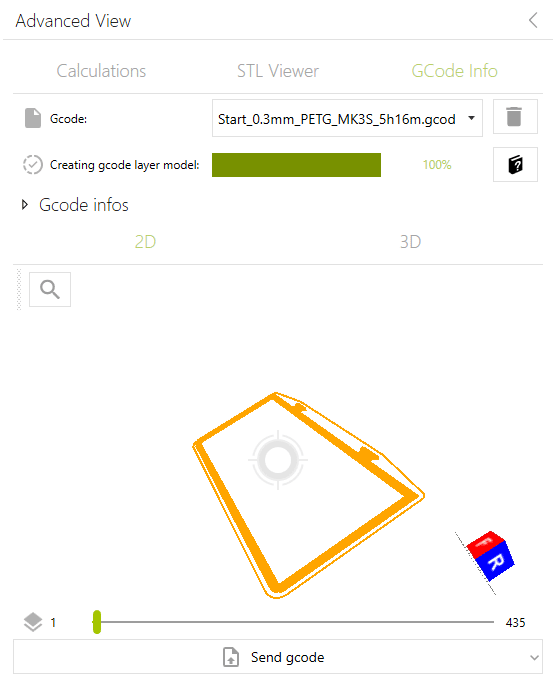
You can rotate the object by pressing and holding the right mouse button and zooming with the mouse wheel. Clicking the magnifying glass resets the zoom to default.
Add print information manually
Unfortunately, since it is not possible to import output files from e.g. SLA printers, you have the option of creating such information manually. To do this, click on the button to the right of the number of files display (button with the list and the small +).
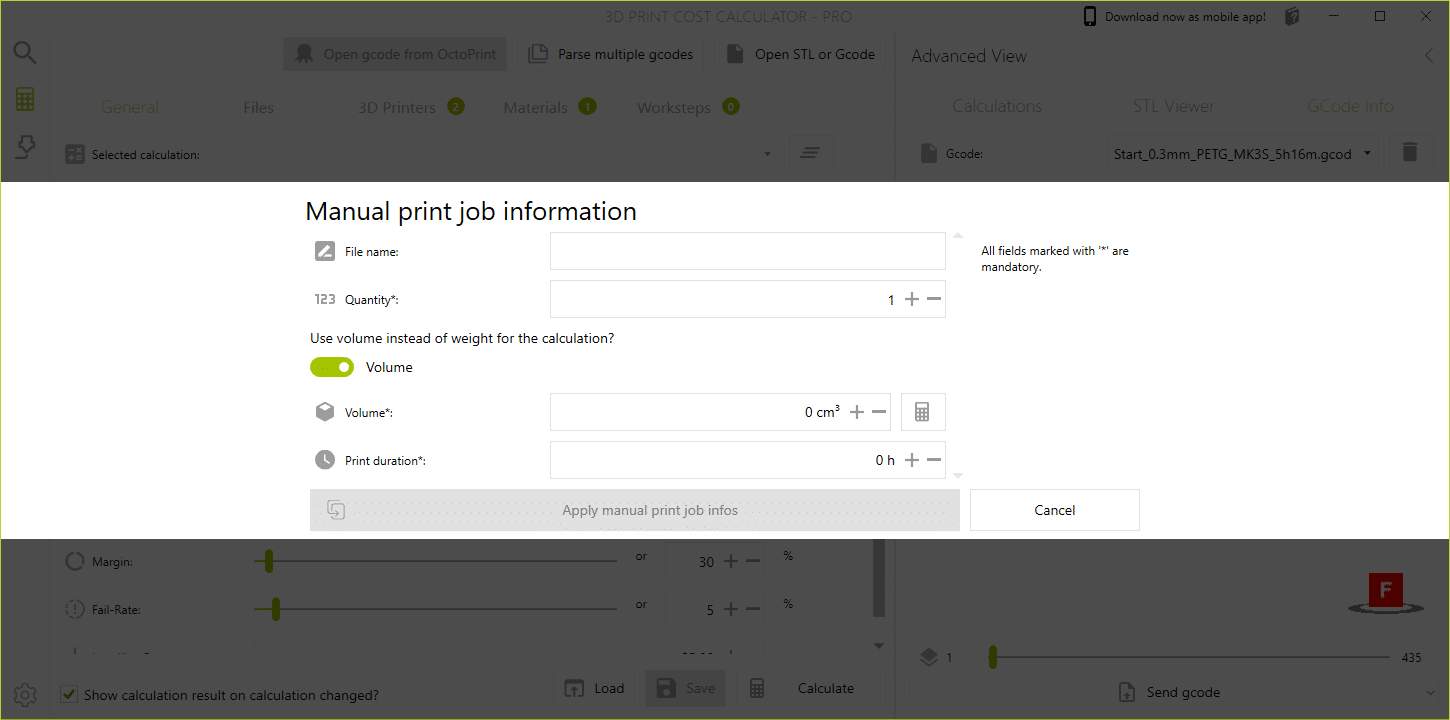
Files that are created manually are treated like normal Gcode files. Except that these cannot be displayed as 2D/3D models.
Files
In diesem Reiter werden dir alle hinzugefügten Dateien angezeigt. Du kannst STL und/oder Gcode-Dateien hinzufügen. Je nach Datei werden diese dementsprechend unter den beiden Gruppen angezeigt. Zusätzlich befindet sich hier auch die Fortschrittsanzeige für den “Mehrfach-Gcode-Parser”.
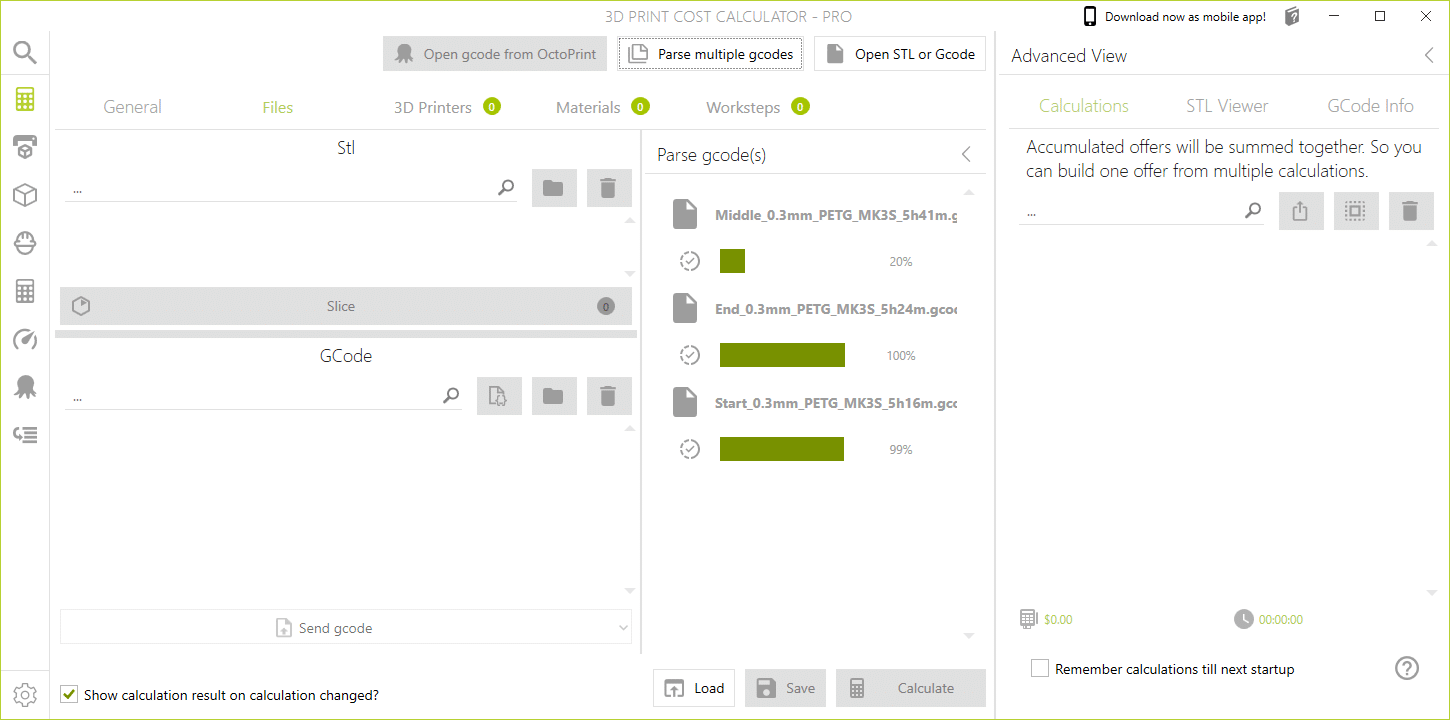
When the analysis is complete, the Gcode files are displayed in the left pane.

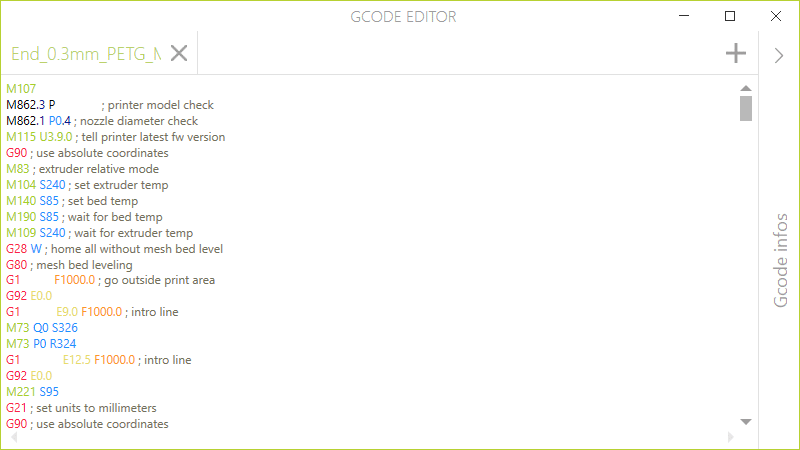
Actions for selected Gcodes
The following functions are available for selected Gcodes from the list.
- Open gcode editor
- Open storage location
- Remove selection from list (Gcodes are not deleted from your PC, only from the list)
Actions for STL files
The following functions are available for selected STL files from the list.
- Open storage location
- Remove selection from list (files will not be deleted from your PC, only from the list)
- Auswahl an deinen bevorzugten Slicer senden
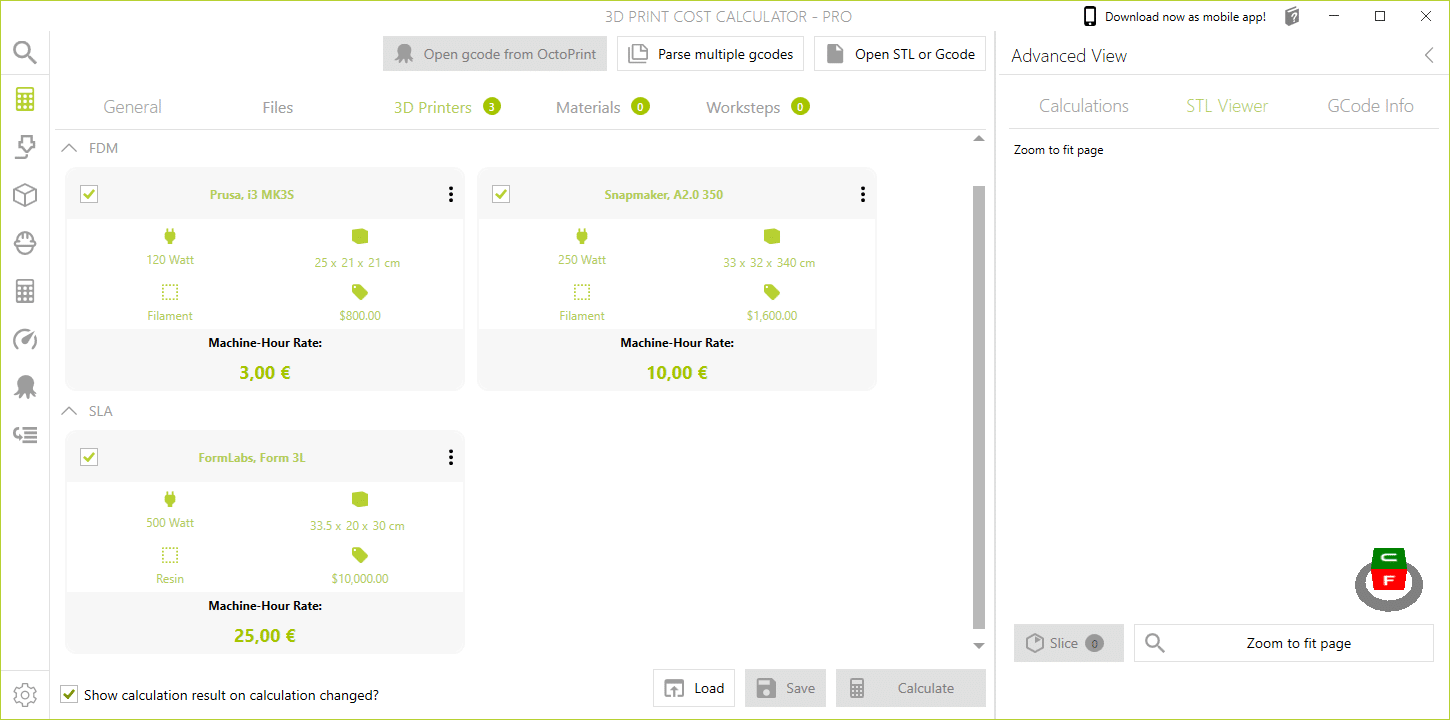
3D Printer
In this area you will find all created 3D printers. You can select multiple printers for your calculation and switch later in the calculation window. So you can see immediately what the prices are for the respective 3D printers.
Create a new printer
You can find out how to create a new printer here.
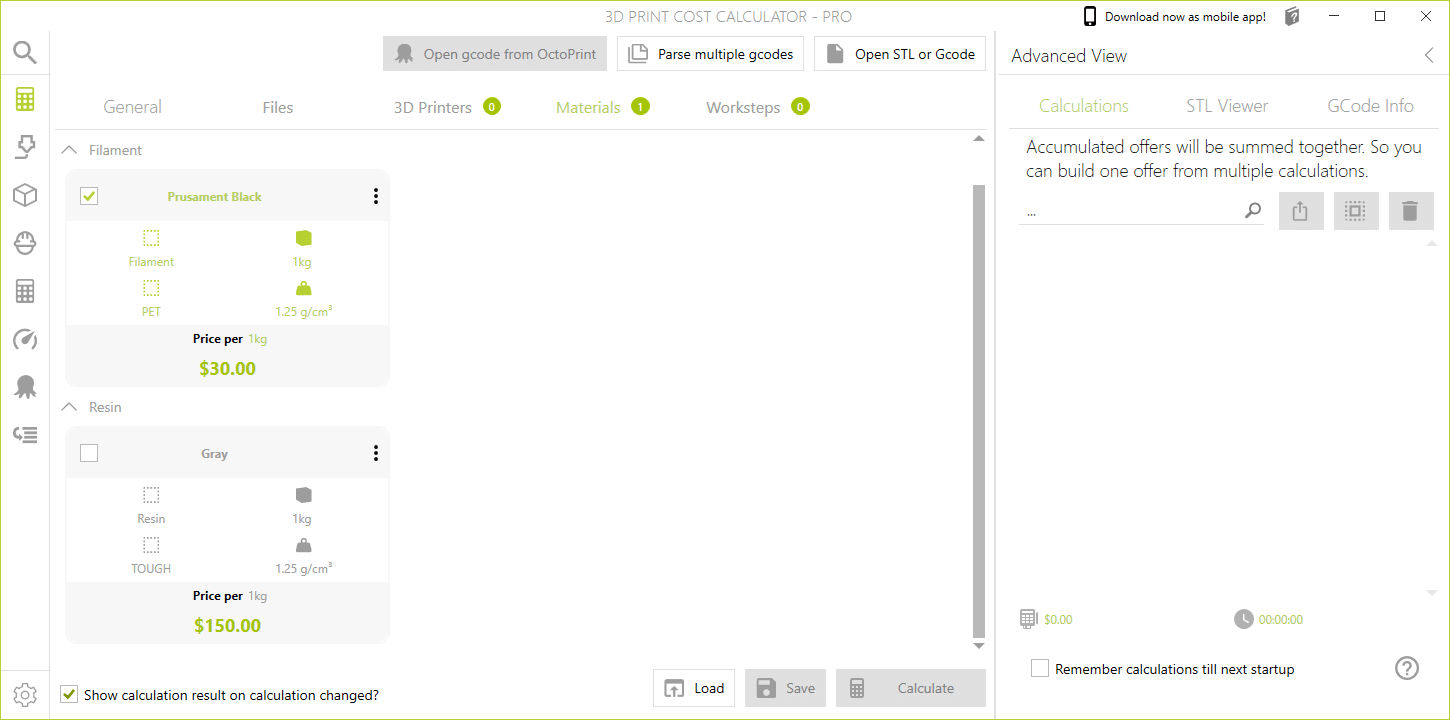
Materials
This area is structured as for the 3D printers. Materials selected here are used to calculate your 3D print job.
Create new material
You can find out how to create a new material here .
Work steps
In this area you can select additional work steps for your calculation. You can define three different types of work steps.
- Per hour
- Per piece
- Per order
Furthermore, these work steps can also be assigned to a chronological sequence.
- Before (steps done before 3D printing)
- After (steps to be done after 3D printing)
- Miscellaneous
Create a new step
You can find out how to create a new work step here.
Define standards
You can define standards for 3D printers, materials and work steps in the settings. These are then automatically preselected. when the dashboard opens.
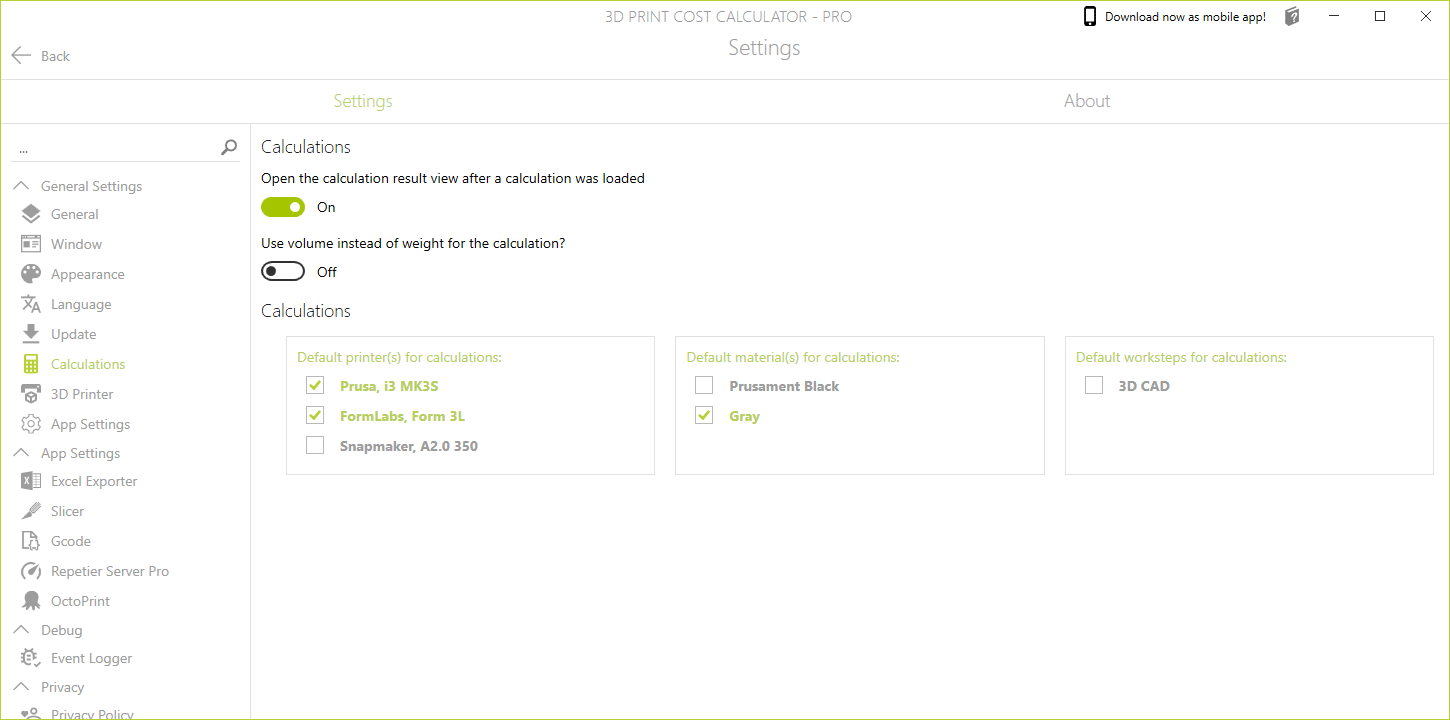
Die Einstellungen kannst du unter den “Kalkulation”-Einstellungen ändern. Mehr erfährst du unter diesem Link.