
Available from
v0.1.1-betaOnly in Pro version?
YesOctoPrint is a free 3D print server, which you can also install and use on your Raspberry Pi. By using a print server, you can easily integrate your 3D printers into your network and control them remotely. The integration in our 3D printing cost calculator makes it even easier!
Advantages
- Start and monitor print jobs
- Upload new files
- Manage files and folders
- Control the printer
- Switch between different printer profiles
- and many more
Note
Please note that this is not an official software from OctoPrint and we & our software have no connection to OctoPrint and / or its operators. Our OctoPrint Dashboard uses the public Rest API to communicate with your server.
Files & groups
Files
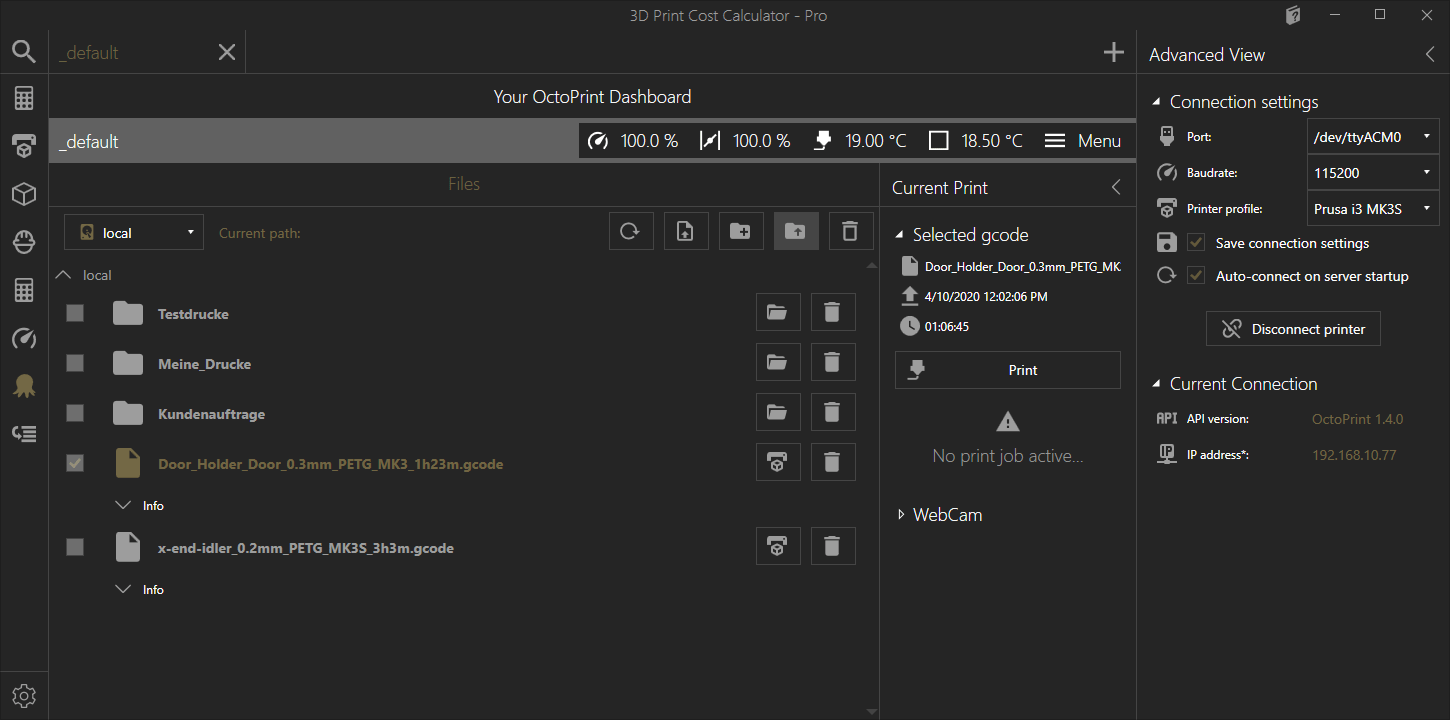
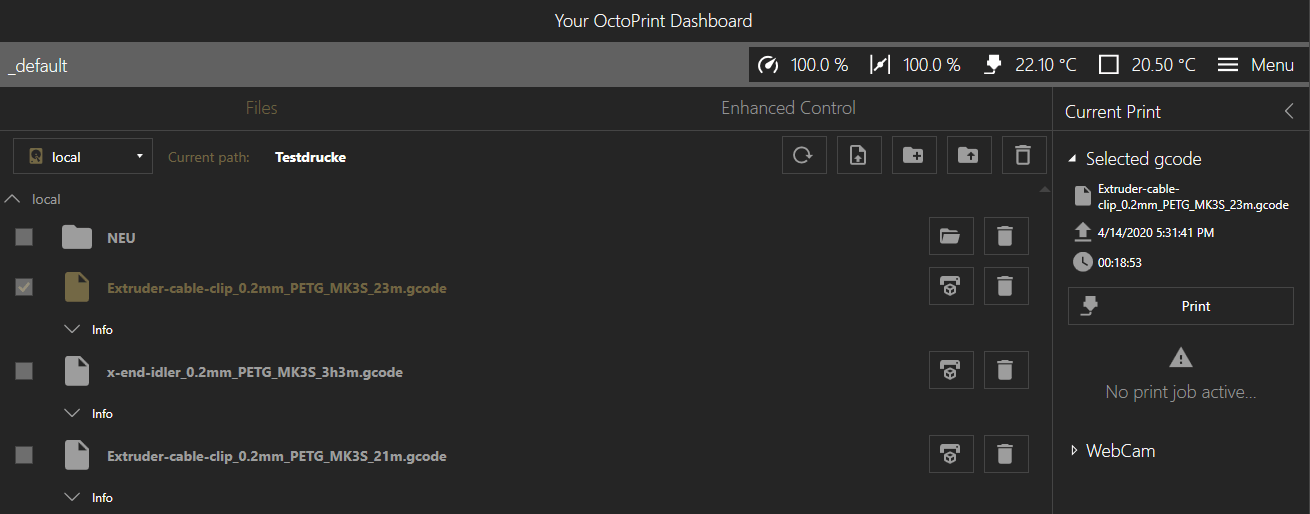
In the foreground of the dashboard are your 3D printing projects, which are located on your server or on your printer (SD card). You can see the current status of your files in the file view window.
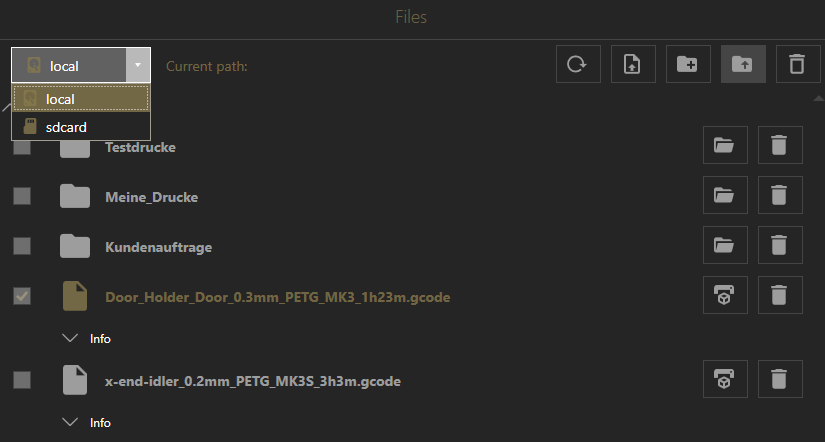
Anders wie bei Repetier Server Pro kannst du hier zwischen den “Lokalen” und den Daten auf der “SD-Karte” wechseln. Des Weiteren werden dir hier auch die Ordner angezeigt. Du kannst einen Ordner betreten, indem du diesen Doppelklickst oder auf den “Ordner öffnen”-Button klickst (Neben dem “Löschen”-Button bei jedem Ordner).

Dabei kann es dir passieren, dass du auf einen leeren Ordner triffst. Hier kannst du entweder direkt neue Dateien hochladen, oder einfach wieder einen Ordner zurückspringen. Dafür kannst du entweder den “Ein Verzeichnis zurück”-Button verwenden, welcher dir angezeigt wird. Oder du nutzt den Button mit dem Ordnersymbol und den Pfeil nach oben in der Button-Leiste oben.

An extended info window is available for files. By opening the info area you will get more information about your Gcode. Here it is also possible to save or download the Gcode locally.
File & folder actions
You can perform certain actions on files and folders.
File action
The following actions are available for files:
- Start print
- Delete
- Auswählen (durch das Anwählen der Datei wird diese unter “Ausgewählter Gcode” angezeigt)
- Download (can be found in the extended information area)
Folder action
The following actions are available for folders:
- Enter folder
- Delete folder (inclduing content)
General actions
Furthermore, the following global actions are available to you, which you can execute using the buttons above the file view:
- Refresh list
- Upload files
- New folders
- One folder back
- Delete selection
Upload new file
Wenn du neue Dateien hochladen möchtest, klicke auf den “Datei hochladen”-Button über der Dateiansicht im OctoPrint Dashboard. Dies öffnet einen Dialog, mit welchem du eine oder mehrere Gcode-Dateien auswählen und hochladen kannst. Du kannst entweder deine Dateien direkt über den “Durchsuchen”-Button auswählen oder einfach in die Dropzone ziehen.
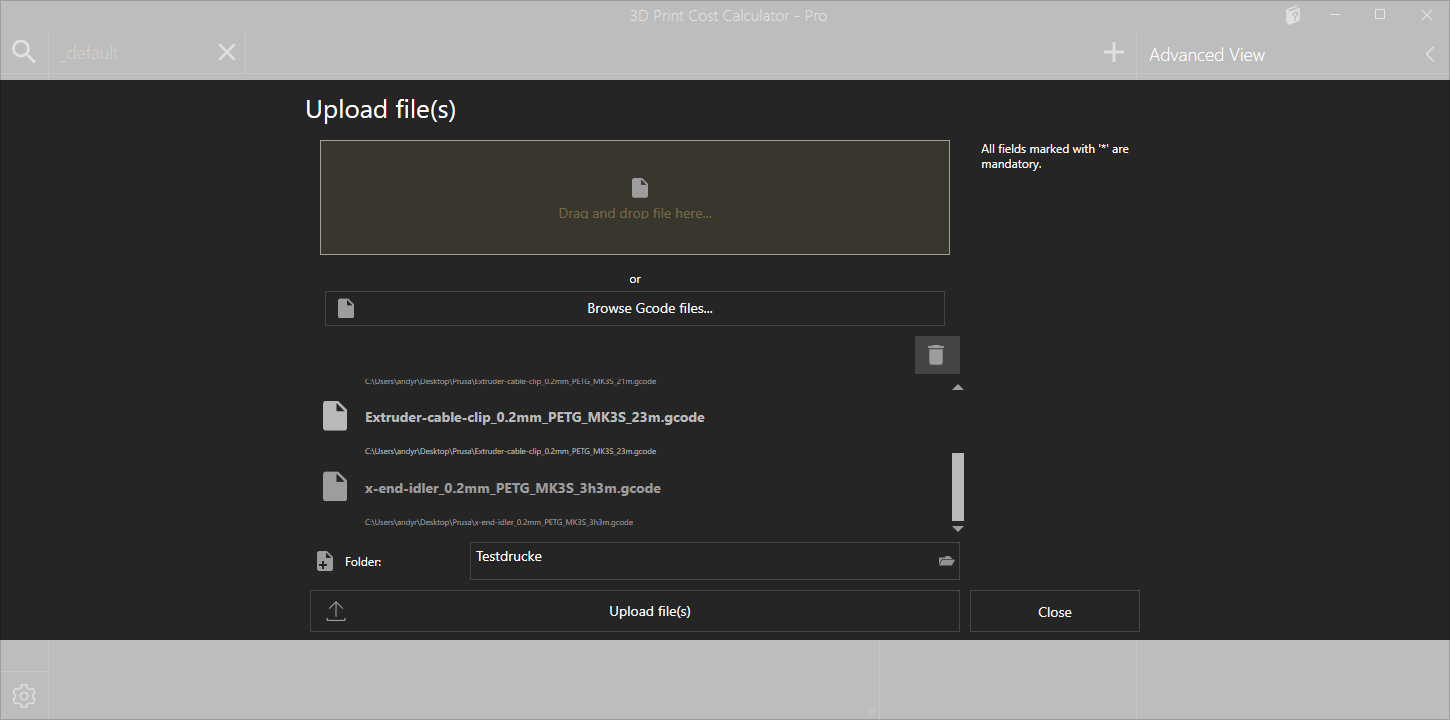
The current path is automatically used here when you are currently in the file view. You can follow the current progress directly in the dialog.
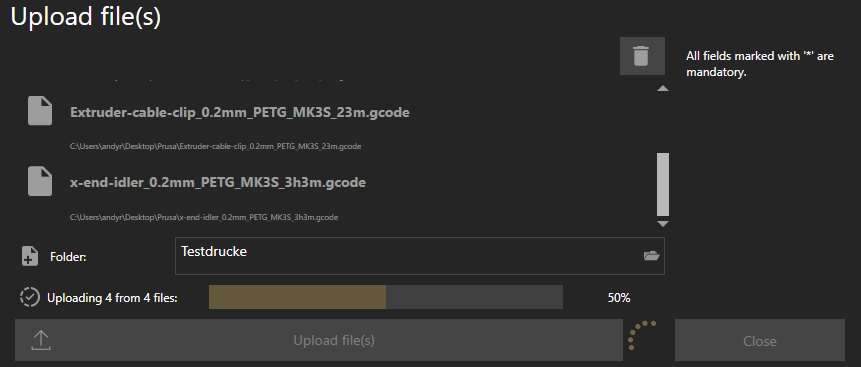
Ist das Hochladen abgeschlossen, wird die Liste der gewählten Dateien automatisch geleert und du kannst weitere Dateien hochladen oder den Dialog mit “Schließen” beenden.
Control
You can control your printer directly from the OctoPrint dashboard. Among other things, you have access to the following functions.
Temperatures
Aktuell kannst du mit unserem Dashboard die Temperaturen des bzw. der Extruder (max. 2), sowie dem Druckbettes einstellen. Gib dazu einfach den gewünschten Wert in die Nummerbox ein und bestätige deine Eingabe mit “Setze Temperatur”.
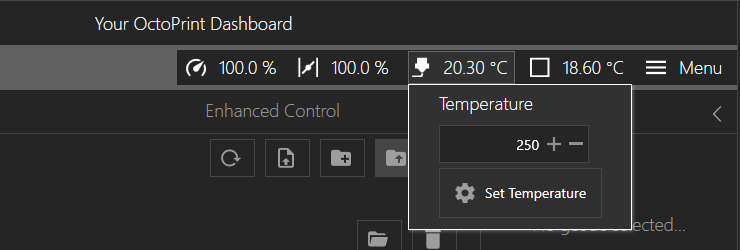
Die Eingabe von “0” deaktiviert den Aufheizvorgang und der Extruder kühlt ab. Gleiches gilt für das Druckbett.
Start print
Es gibt zwei Möglichkeiten, wie du einen Druckauftrag starten kannst. Entweder wählst du zuerst den gewünschten Gcode im Dateibrowser aus und klickst auf den “Drucken”-Button in der “Aktueller Druck”-Seitenleiste oder du klickst direkt auf den “Druck”-Button der jeweiligen Datei.
You will be asked again if you really want to start the print job. If you confirm this dialog, OctoPrint starts printing the selected Gcode.
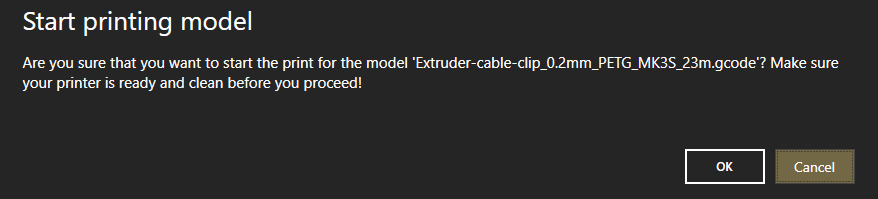
Wurde der Dialog bestätigt, beginnt der Druck (nach vorherigen Aufheizen versteht sich). Du kannst dann den aktuellen Fortschritt in der “Aktueller Druck”-Seitenleiste verfolgen.

Current print
In addition to progress, you can also pause or cancel your print here. Please note that if you pause your printing, you have entered an event based gcode for the pause event in OctoPrint. Otherwise it can happen that the printer simply stops where it is printing and switches off its nozzle.
Find out how you do it under OctoPrint event based Gcode scripts can be created and stored.
Connection information
In der rechten Seitenleiste “Erweiterte Ansicht” findest du die aktuellen Verbindungsdaten zu OctoPrint und deinen Drucker(n).
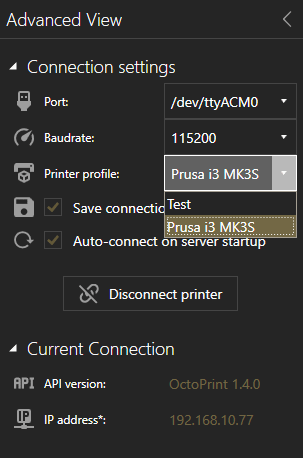
Connection settings
Dies sind die Einstellungen um dich mit deinen Drucker zu verbinden. Hier kannst du dein Port, die Baudrate und dein Druckerprofil auswählen. Wenn du die Option “Verbindungseinstellungen speichern” auswählst, dann werden deine aktuellen Einstellungen auf deinem Druckserver gespeichert und stehen beim nächsten Start so wieder zur Verfügung.
Wählst du “Automatisch bei Serverstart verbinden”, dann versucht OctoPrint automatisch eine Verbindung zum letzt verwendeten Drucker herzustellen. Ist die Verbindung erfolgreich, dann zeigt der Button “Drucker trennen” an. Andernfalls kannst du den Drucker manuell durch das Klickend es Buttons verbinden oder trennen.
Current connection
This information area shows you the current connection. This is the IP address or server name and the current version of the OctoPrint API.